

Baseball is America's favorite pastime, and photographing the game can be just as exciting as watching it. With these six essential tips for taking better baseball photos, you'll be able to capture every moment on the field in stunning detail, from the crack of the bat to the slide into home plate.
1. Get as close to the action as you can.
Wherever possible — in big stadium or sandlot seats — try to nearly fill the frame with your subject rather than have him or her show up as a distant speck. That means you’ll want to get as close as possible to the action!
However, it’s not always possible to find yourself right behind home plate, especially at professional or college games. Instead, you’ll want to adapt and ensure that you have the equipment you need to get the right shot. That could include special lenses or a camera that capture wider, long-distance shots.
From most seats in the stands, a 200mm lens (or an 80-200mm zoom) will probably do fine. But realize this: Unless you have professional gear, the maximum aperture of your 200mm lens is probably around ƒ/4.5. It's not very fast. This means that you may not be able to shoot at a fast-enough shutter speed to stop the action, especially when your subject is in a shaded area of the field. It should, however, be fine for action in sunny areas — so concentrate on those.
You’ll also want to keep in mind that you can’t control what happens in the game or the crowd, so planning is essential to making sure you get the shots you want.
If possible, try to get seated in a front row where your view will be unobstructed. Can't get a front row seat? No problem! Instead, sit in the last row in the stands and make sure you have an unobstructed view.
Still, there are more opportunities for you to get close at the Big League ballpark. Pre-game and postgame activities can be ideal for access to your favorite players. Get to the stadium early, an hour or more before game time, and don't be surprised if you can walk down to the first row with your camera. Frequently, you'll be able to shoot closeups of players taking batting practice, standing around waiting for their turn at bat, practicing fielding, signing autographs, or just talking with fans in the stands. You should be able to get some great baseball photos!
To boil all this down: Try to get as close to the action as you can. Use a long lens if you're seated way back. Make sure your view is unobstructed. And consider pre-game and post-game photo ops when all else fails.
Read more: 5 Essential Tools for New Photographers
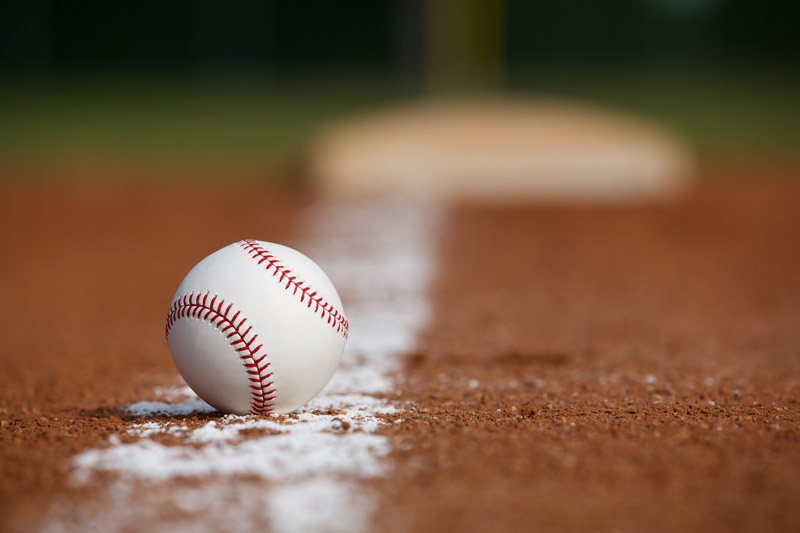
2. Show the ball in your baseball photos.
When you shoot an action baseball photo, whether it's the batter taking a mighty swing or a close play at first base, the picture is much more effective if it shows the ball too. Or, if you're shooting the outfielder circling under a fly ball, try to capture the ball in the same picture so that we see the subject of the fielder's concentration.
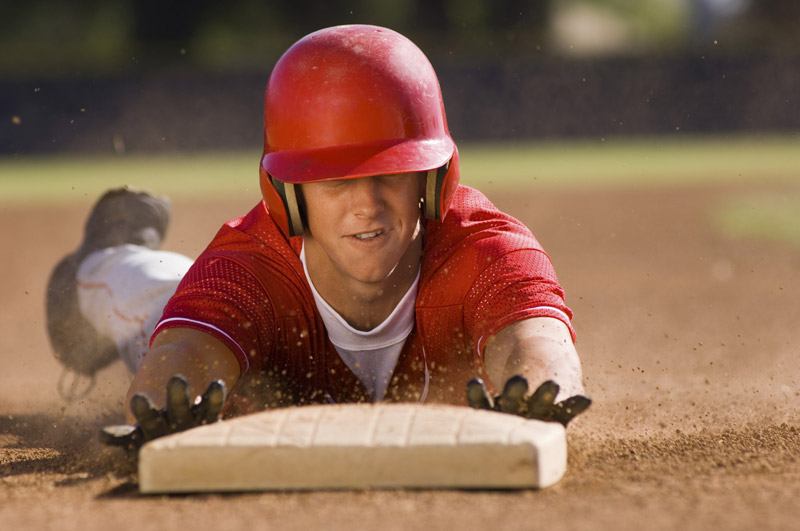
Of course, not every shot can show the ball. For example, the baseball photo showing the kids in the "dugout" while their team is at bat can't show the ball. And there are some action shots that work fine without the ball: The runner sliding into third, for example, may make a great shot even if the ball is still on its way from the outfield.
3. Use a fast ISO setting on a digital camera when taking baseball photos.
ISO 800 is good, 1600 is better, and 3200 or 6400 is often even better — or absolutely necessary. That's because you want to use the fastest possible shutter speed to stop the action. But what about ISO noise?
Noise in photos, or rather the perception of excess noise, has been virtually eliminated from today's cameras. In order to attain a fast enough shutter speed, you will often need to shoot with extremely high ISOs such as 800, 1600, 3200, maybe even 6400. On most of today’s DSLRs you can do so without an unacceptable level of noise.
Read more: What Digital Camera is Best for a Beginner?
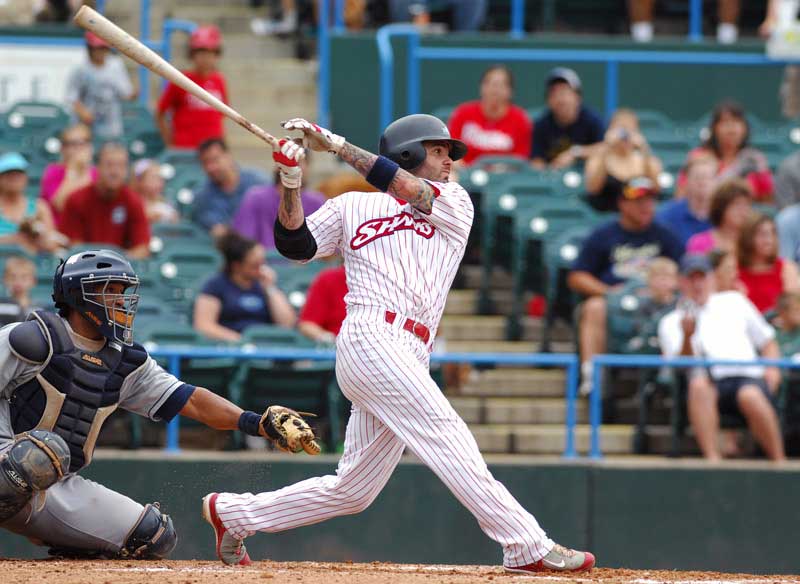
4. Show the player's facial expression, if possible.
In photojournalism, they call this a "reaction shot." This is an important baseball photography tip: It's the look of triumph or tragedy written indelibly on the player's face. It's what every good photo editor looks for in baseball photos that will make tomorrow's sports section. And reaction shots — facial expressions — will make your baseball pictures too. What types of facial expressions? We've already referred to the look of triumph or tragedy — on television, what they refer to as the look of "agony or ecstasy." That's what you want to capture in your picture: The joyous grin of the batter as he watches the ball sail over the fence. The exultation of the pitcher after he throws a third strike. The look of disgust as the batter slams his bat down after striking out. The cheers — or dejection — of the waiting players in the dugout as they watch their teammate get a crucial hit...or strike out. The grimace of distress on the pitcher's face as the umpire calls "Ball Four." And, of course, the angry look of the coach as he argues with the umpire.
But, don't forget, all reaction shots are not on the field. Turn around and take pictures of the fans in the stands whose faces reflect the action on the field. There's human action everywhere you look - on the field and in the stands. And good reaction photos are winners!
Realize this: You can't always capture the critical moment of the action. Sometimes it takes place out of your camera range. Sometimes you just plain miss it. But you can, and should, try to get great reaction shots at every game.
Read more: 5 Places to Sell Your Photos
5. Anticipate where the action will be.
We've just referred to the "critical moment." Those of you familiar with the works of Henri Cartier Bresson know he thought that every great photo resulted from capturing, what he called, the decisive moment. Let's refer to it in baseball as the critical moment. While we've said you can't always capture the critical moment, you certainly should try. And this means anticipating where the action is likely to occur.
If you want to take some classic baseball photos of a runner who's on first, either set yourself up near first base (to get shots of pick-off attempts) or near third base (to get the runner if there's a hit). If your subject is the batter, either get as close as you can to the batter's box (so you can have a good angle to record the mighty swing) or close to first base (where you can grab a shot after he or she connects with the ball...or strikes out). What about that "over-the-umpire's-shoulder" shot from behind home plate that we mentioned earlier? It's a great position for using a long lens to capture the pitcher's grimacing facial expressions as he delivers the ball (or watches it sail over his head), but not a great position to capture the batter's face. A bit off to the side (toward first base) is better for this.
What do we mean by anticipate? We mean that you should aim your camera at the point where you expect the action to be, and preset the focus for that area. (If you're using a quick-reacting autofocus camera, you may not have to deal with this.) Let's say there are runners on second and third. The big play is most likely to be at the plate, so it makes sense to train your camera on the plate, set focus (and, as we explain in a moment, exposure)...and wait for the action to unfold. If you're right, and there is a play at home, you're ready to capture the critical moment. But don't take your eye away from the camera after you shoot the first shot. Be ready to shoot a second...and a third. Anything can happen. The ball might be dropped by the catcher. The runner may exchange a photogenic "high-five" with the on-deck batter. The manager may come storming out to protest the call. Be ready!
One other advantage of anticipating where the action will be, involves exposure. (If your camera offers quick-acting auto-exposure, you may be able to rely on it when you shoot.) Typically, one thing you have to consider during day games is that one part of the field may be in bright sun while the rest is in shadow. If you anticipate the action at home plate which is in bright sun, you can set your exposure for the bright home-plate area in advance. If you don't anticipate — and your camera does not offer quick-acting auto-exposure — your exposure may be way off.
Another important baseball photography tip: Where you have a choice of shooting action in a sunny area or a shadow area, opt for the sun. You want to shoot at the fastest possible shutter-speed to freeze the action. Deep shadows may call for a slower shutter-speed that won't stop the action. Of course, if you have no choice the first rule is: Go where the action is!

6. Finally, be prepared for the unexpected.
While it's great to be able to follow all five of the prior tips, they're not hard and fast rules. Be alert for the possibility of something that makes a good picture, even though it's elsewhere on the field and you couldn't possibly anticipate it. In the words of the Boy Scouts, "Be prepared."
What the pros use.
We can't leave this topic without discussing what the pro uses at a baseball game. The typical professional sports photographer probably uses a lens like an ƒ/2.8 300mm. Why? He or she wants to be able to stop the action wherever it happens, whether in the shade or bright sun. Your ƒ/4.5 200mm may stop the action in bright sun, but it may not be fast enough to stop the action in shady areas. That's why we advise you to use a higher ISO setting on your digital camera. The higher the ISO setting, the less light you need to stop the action with your aperture of f4.5.
As an alternative, you can run out and buy an ƒ/2.8 300mm or some other long and fast lens like the pros. Very impressive artillery. But should you rush out and buy one? Not unless money means nothing to you. Longer lenses are available at higher prices!
But that's not the only equipment the pro uses at a baseball game.
Naturally, pros carry more than one camera body. Plus an assortment of long lenses. Plus a monopod or tripod to steady those heavy telephoto lenses.
Professional digital SLR bodies offer high speed capture and a buffering system that allows rapid firing. Pros also bring spare batteries, a charger and possibly a laptop to review and edit their pictures. The pro's gear usually includes back-up camera bodies, a light meter and a flash for close-up work before and after the game.
The moral of all these baseball photography tips is that you don't need the pro's heavy artillery to take outstanding baseball photos. Just combine your existing camera with some "smarts" — apply some of the knowhow we've presented in this article — and the next time you go to the ballpark, you'll come home with some really great baseball pictures.
Want to learn how to become a photographer? NYIP offers an online professional photography course that can help you learn the basics and get started as a professional photographer. Request your free course catalog today!


