

If there's one word for what Topaz software does for my photography it would be "Wow!"
My name is George Delgado, and I'm a PPA Certified Professional Photographer. My "day job" is as a Student Advisor at New York Institute of Photography, America's oldest and largest photography school. When I'm not here at NYIP helping photography students become better at their craft, I'm out in the "real world" doing professional assignments that range from corporate portraiture to fashion and commercial photography assignments. I'm also a licensed New York City Tour Guide, and that's where the story of this particular photograph begins.
I was taking a group of out-of-town visitors on a Photo Tour of lower Manhattan, covering the area which includes Wall Street, Federal Hall, the nations first Capitol and site of George Washington's Inauguration. We finished the tour at the South Street Seaport, a popular tourist spot and home to a maritime museum, which maintains a number of historic sailing ships, as well as The Shark speedboat, a thrill ride run by Circle Line Tours. I just had time during the tour for one handheld "grab shot" of the ships, including The Shark, with the downtown skyscrapers as a background.
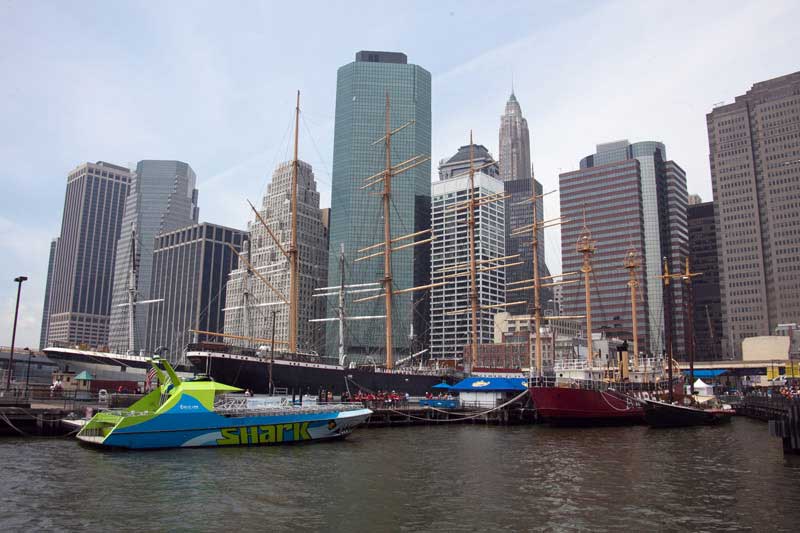
The original RAW capture was a bit dull and uninspiring. The buildings were distorted by the wide angle lens I selected, leaning in toward the center of the frame. And it was also low contrast, lacking sharpness and vibrancy. I tweaked the exposure a little in Lightroom, and then brought the file into Photoshop for more serious enhancements.
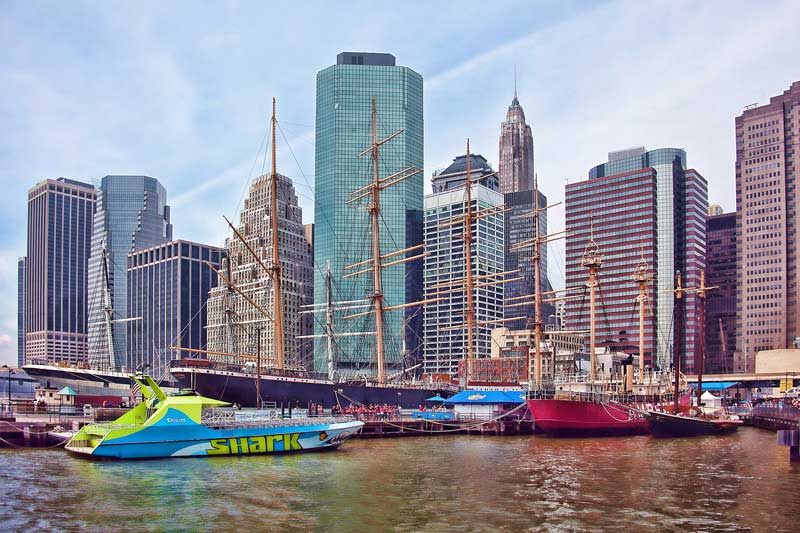
After using Photoshop's Perspective Control Cropping Tool to get the buildings in the background into proper alignment, I clicked on Photoshop's Filters Menu to select my Topaz Clarity and Adjust add-ins. I created an individual layer for each filter so I could adjust the opacity separately to "fine tune" the result.
With just a few clicks in Topaz Clarity to enhance the contrast, and another click or two in Topaz Adjust to bring up the colors, I had the "after" shot. What a difference! There was now crisp, sharp detail throughout the image, from the facades and architectural detail of the buildings, to the rigging of the tall ships. The autumn sky was now a subtly more saturated blue, with wispy thin white clouds, instead of a hazy overcast. The skyscrapers in the background had gone from a monochromatic gray to a variety of distinctive colors showing the variations in brick, marble, steel and glass materials. Each building stands out on its own, with the red hull of the Ambrose Lightship and the neon blue and yellow of The Shark really popping now. The water in the foreground has more sparkle in the after shot, and the reflections of the boats and buildings are more distinct.
It could have spent hours trying to tweak this photo using Photoshop's built in tools, adjustments and filters; however I might not have gotten as good a result. Using Topaz add-ins took just minutes to apply. These are remarkably fast, easy, and effective tools.
A good photograph should tell a story and have an emotional message. My original image capture didn't express itself very well. Thanks to Topaz, the photo now says "South Street Seaport is a fun destination; a dynamic and vibrant place where New York City's maritime heritage meets Wall Street's financial power."
Bonus: Want to learn how to take and edit great photos? Become a photographer with NYIP.


