

Daniel Norton is an NYC-based photographer as well as one of the industry’s most renowned experts in lighting technique. Often called upon by top professionals of the business, Norton specializes in intricate illumination setups, perfecting the visual mood for a variety of photos with purpose- including mouthwatering shots of food (yum).
To celebrate National Donut Day, we spent the afternoon at Adorama’s NYC headquarters mastering our food photography skills (and eating donuts) with the help of Daniel. Here’s what we learned:

1. Use props.
- Certain foods are plain to look at (a granola bar, an apple, etc.) and need the provision of props for some added visual enhancement.
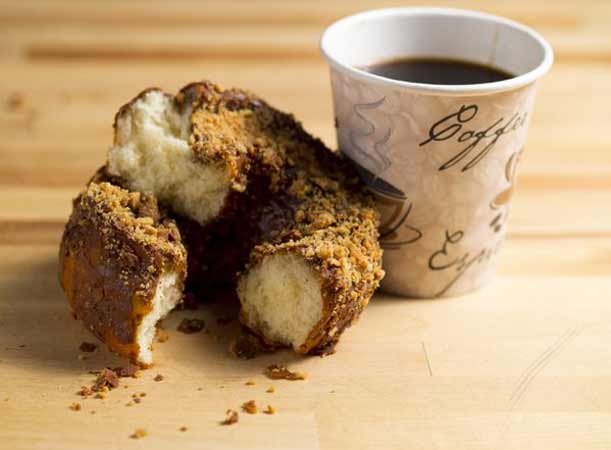
- For example, today we were asked to photograph donuts and coffee- separately, then together. While the donuts were covered in unique toppings and colorful frosting, the coffee was plain and black. So when shooting it alone, we needed to add excitement. To do so, we decided to grab some decorative, peppermint-flavored stirring sticks from a nearby candy store. When posed effectively on top of, next to, then dipped inside the coffee, the sticks gave the shot more visual interest than we would’ve been able to capture otherwise.
- When photographing food, dishware is absolutely a prop as well. Unless you’re going for a certain look, paper plates just won’t cut it. Try placing food on something more interesting, like a cutting board or a pretty countertop. These small logistical changes are crucial in developing an especially appealing shot of something edible found in an attractive, fun environment to hang out and eat.
- Considering all this, if you’re ever hired to photograph food for a client, be sure to factor those added purchases into the budget you propose- customers might not provide you with props or appropriate dishware otherwise.
2. Self-assign.
- When it comes to food photography, there’s no excuse for lack of practice. If you’re ever munching on an interesting treat (or even a boring one), snap a few shots and experiment with your posing and compositional techniques.
- If you find yourself practicing consistently, consider creating a small food blog or Instagram account (if you already have a blog or IG, it might be helpful to create a separate, niche account solely dedicated to your food shots).
- If you need some inspiration to get started, National Cake Day is in 3 weeks- you could try using that as your first at-home project to conquer.

3. Don’t try anything crazy- until the end of a shoot.
- At one point during today’s shoot, an audience member suggested that we should dunk the peppermint stirrers inside the coffee and mix them around to create a pinkish-white swirling effect in the drink. An excellent idea- unless we gave it a try, it didn’t go well, and we ran out of coffee. Although coffee can easily be refilled for multiple attempts at a low cost, the same can’t be said of other food options.
- So if you’re asked to photograph an intricately rimmed cocktail, for example, and want to experiment with an edgy shot of the drink being splashed or spilled, don’t go for it until you’ve already taken the rest of the shots you’ll need. That way, if you go for it and the shot comes out perfectly- great! But if you go for it and you’re disappointed, it won’t matter that your subject is now in a puddle on the floor.

4. Simplify.
- In food photography, the item you’re featuring needs to be the main focus of your composition. To ensure proper execution of this, be sure to remove any unnecessary noise from the frame.
- When photographing the peppermint sticks this afternoon, we originally planned to leave them in their festive packaging. However, their wrappers were made of shiny plastic, which would’ve made a reflection, likely drawing the viewer’s eye to the wrapper rather than the food itself. So we unwrapped them- simple as that.

5. Capture color.
- The richer and more accurate the color, the more effectively your photos will portray the essence of the food and its flavor. Our friends at Adorama recommended using flash or tungsten in doing so.
- Another way to alter the color representation in your shots is to adjust your flash set-up. Today, we shot both with and without a silk screen held in front of the flash unit, in order to achieve a wider variety of lighting schemes and resulting hues.
6. Mix it up.
- Although repetition of form is a standard technique in many other photographic categories, perhaps we should shelve this method when working in the kitchen.
- Food can get messy, and that’s part of the reason we love it so much. So if you’re photographing a gooey, partially eaten pan of homemade mac and cheese and a half empty bottle of wine in an attempt to invoke the feeling of a warm dinner party with friends, symmetrical perfection might not be the way to go. Experiment with visual struggle and sloppiness in an effort to demonstrate the emotion you’re trying to recreate.

7. Consider the timing.
- Although coffee and donuts can be part of an early morning, pre-work routine, today’s props led us in a different direction. Elaborate icing decoration combined with the after-dinner routine of peppermint contributed to our decision to visualize our food subjects as part of a post-dinner, elegant wind down at home.
- So regardless of what food you’re working with, trying to visualize an actual, real life situation in which it would be consumed can be extremely helpful in guiding you through your compositional adjustments.
- For example, once we determined that our coffee and donuts were being eaten as a cozy, after-dinner treat at home, we consequently decided to compose a dimmer, more intimate lighting scheme. Although these adjustments seem trivial, once they come together effectively, you’ll quickly see how they contribute to the creation of a more comprehensive, expressive food photo overall.
Couldn’t make it to Adorama today? No worries! You can watch a full live-stream of the event here, or follow along our live-tweet account on Twitter.
Want to learn more? NYIP offers accredited photography classes that can help you improve your hobby or start a new career. Request your free course catalog today!


