

At NYIP, we're glad to have readers and students from all around the world. Some of you will be lucky enough to be in the path of a total solar eclipse this afternoon. Maybe some of you have the time and money to drop everything and head to one of the exotic areas in the path of totality. For those of you who are going to be there, here’s some advice from an eclipse photography expert, Don Sheff, on how to take the pictures of a lifetime of the event of a lifetime:
One of the wonderful things about photography is that whatever your interest, it can be enriched with your camera. If you love to travel, taking pictures in exotic lands is half the fun. If you love scuba diving, underwater photography is part of the joy. If baseball is your passion, your long lens can add excitement from the stands.
One of my passions is astronomy. Which brings us to the point of this article.
This afternoon, one of Nature's grand spectacles will occur — an eclipse of the sun. Nothing you've ever seen before prepares you for the breathtaking quality of a total eclipse — an eclipse in which the disk of the moon blocks out all of the direct light from the disk of the sun. Until virtually the moment of totality, the sun shines brightly in the daytime sky. Suddenly, as the moon covers the entire face of the sun, the sky turns dark, stars can be seen in the darkened firmament, and the black disk that is the moon is surrounded by the eerie glow of the sun's otherwise invisible corona.
It's a sight to behold — and to photograph!
Solar Eclipse Photography
WARNING: Looking directly at the sun is dangerous and can harm your vision. Looking directly at the sun through the lens of a camera or through a telescope is even more dangerous. Make sure to follow the precautions listed in this article.
A total eclipse of the sun occurs somewhere on the earth only about once a year. Many times, the eclipse takes place out in the ocean or in some remote location. Years ago my wife and I traveled to northern Chile to see and photograph the spectacle of a total eclipse, then again we observed another total eclipse that swept over the island of Aruba in the Caribbean.
If you have the good fortune to be in the path of totality this year, or elsewhere in the band that has been charted by astronomers, you can see-and photograph-the wonder that is a total eclipse.
If you are anywhere else, you won't see the total eclipse, but if you are close enough to the path-of-totality you will see a partial eclipse. What is a partial eclipse? An eclipse where the moon covers only part of the disc of the sun.

So what will you see during a partial eclipse?
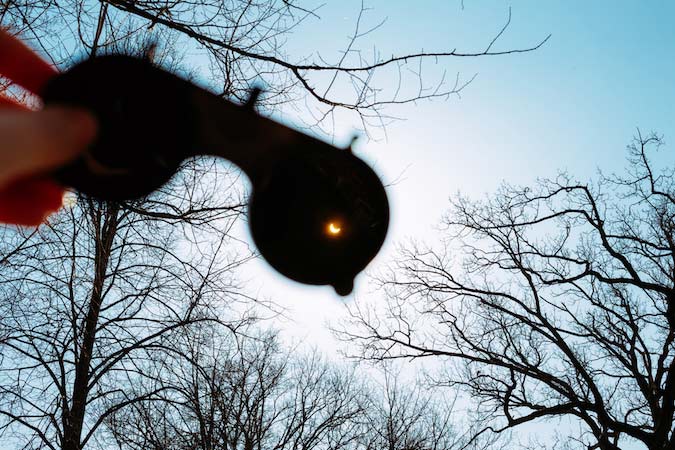
Unless you look at the sun through a proper filter — a subject of great importance that I will cover in detail below — you will see very little. Unfortunately, the difference between a total eclipse and an partial eclipse is like the difference between lightning and a lightning bug. A couple of years ago I photographed a partial eclipse in which 96% of the sun was covered by the moon. But even 4% of ordinary sunlight was so bright that you couldn't look directly at the sun, and the difference in general daylight was insignificant to the uninformed. In this case, I was on a golf course with my telescope-and-camera setup. The golfers on the course probably never knew there was a partial eclipse; they just played on without skipping a stroke, perhaps thinking that a large dark cloud had passed overhead and obscured the full sun! That's when viewed with the naked eye. But a partial eclipse is interesting, even exciting, when viewed or photographed through the proper filter. Viewed through the proper filter, the yellow disk of the sun appears to have a dark round "bite" taken out of it. The "bite" is really the impinging disk of the moon. As more and more of the sun is obscured by the moon, the disk of the sun looks more and more like a crescent.
Whether you're in the path of totality or close to it, most of the time you will be photographing a partial eclipse. If you're outside the path of totality that's what you'll see. If you're in the path of totality, you'll be photographing a partial eclipse as the disc of the sun is partially covered by the moon, and then for the moment or two of totality you'll have a chance to photograph the actual full eclipse. There will be another period of partial eclipse as the moon moves away from the sun.
So, if the partial eclipse can be viewed from your location, or if you're lucky enough to be in the path of totality, you have an opportunity to take some interesting pictures. But you have to know how to do it and you must take the proper precautions. And that's the subject of the rest of this article.
How do you photograph a partial eclipse? Carefully! Very carefully. Be forewarned — you can be permanently blinded if you stare at the everyday sun for just a few seconds. And if you look at the sun through a telescope for even a fraction of a second, you can forget ever seeing again through that eye!
Look at the sun only through a proper solar filter. This is a special filter made of either glass or Mylar coated with a virtually opaque layer of aluminum. A solar filter cuts down sunlight by 99.9999%. It transmits only about 1/1000th of one percent of the light. (Note: The solar filter fits over the large end of the telescope. Never use a small solar filter that screws into the eyepiece — the heat of the sun will crack it.)
You may hear that a solar filter is equivalent to a #5 Neutral Density filter. True, to a point. A #5 cuts out most of the visible sunlight. But it doesn't cut out enough ultraviolet sunlight, which can blind you. So, don't use a #5!
Observing these warnings, let's proceed. If you don't have a telescope you can still photograph the eclipse directly using your camera and lens with the proper solar filter attached. The image size of the sun, however, may be a mere dot on the negative. A 50mm normal lens has an angle-of-view of 43-degrees. The disk of the sun is only one-half degree, so the image of the sun will be less than 1/80th the width of the negative! To produce a satisfactory image, you need a longer lens. The angle-of-view of a 500mm lens is 5-degrees, so the one-half degree sun will be about 1/10 the width of your negative. Still small, but visible.
If you're using a film SLR or full-frame sensor, the prior calculations are correct. If you're using a digital SLR with a smaller sensor, you'll get added magnification and a 500 mm lens will give you a somewhat larger image of the sun.
With all digital cameras, you need to be careful focusing the camera on the bright sun without protection. Some digital sensors can be affected by too much bright sunlight. While you can protect your eyes by using live view on the LCD viewing panel if your DSLR has live view, that won't protect your sensor.
To get a better picture, you'll have to replace the lens of your camera with a telescope, which is really just a very long lens. I use a five-inch telescope. The objective lens (big end) is five inches wide and the focal length is 1200mm. With this very long lens, the disk of the sun is about half the height of a 35mm frame. Plenty big.
Problem 1: Attaching a camera to the telescope. Easy. Use an adaptor designed for your lens mount. You can get such an adapter in photo or telescope stores.
Problem 2: Seeing an image in a telescope pointed skyward. Rather than bending yourself into a pretzel, put a right-angle finder on your viewfinder to see the image comfortably.
Problem 3: Exposure. Since the brightness of a partially eclipsed sun is essentially the same as that of the full sun, test the exposure on a bright day before the eclipse. Set up your entire rig — camera, telescope, solar filter, tripod — and make the test exposures. Keep track of the exposure of every frame. Last time, my test indicated an exposure of 1/250. During the eclipse I bracketed anyway. (Note: Don't rely on your built-in meter since it will try to render the brightness of the ring of sunlight as a Zone 5 middle tone. You want a bright sun, not a gray one.)
Obviously, you will need slightly more exposure if you're photographing a partial eclipse but in your location the sun will be 98% or 99% obscured. This is a good reason to bracket your exposures.
Photographing the Total Eclipse
For the moment or two that the moon fully blocks the sun, you'll need to give the subject much more exposure. You can remove your solar filter for this period and you should bracket extensively. If you're photographing through a telescope and your aperture is fixed, you'll control varied exposure by changing your shutter speed. The sun's corona has approximately the same brightness as the full moon, so if you're using ISO 100 and your aperture is fixed at f/11, we would suggest making exposures from 1/1000 down to 1/30 or 1/15 of a second. Interestingly, you will get different results, all equally valid, at various exposures, because you'll see different phenomena in various photos. The stunning eclipse photos that you see in magazines are often composites of several different exposures.
Remember that it's going to get dark during the eclipse, so you may find it helpful to have a small flashlight at the ready so you can see the settings on your shutter speed dial in the sudden darkness when your bracketing exposures.
Don't forget to re-mount your solar filter as soon as the slightest portion of the sun becomes visible as the moon starts to move away.
Problem 4: Aperture. No problem. The telescope has a fixed aperture. Whatever it is, that's it!
Problem 5: Focus. Also no problem! Simply look through your camera's viewfinder and focus the telescope.
Problem 6: Tracking. The rule-of-thumb in astrophotography is that unless the exposure time is more than 15 seconds, compensation for the Earth's movement is unnecessary. My exposure time of 1/250 stopped the action. If, however, you're shooting planets, stars, or galaxies at night, your exposure time could be an hour or more. Such shots require compensation for the Earth's rotation.
If you’re able to head out and capture some photos today, be sure to share them with us on social media so we can repost our favorites. Enjoy!


