As I set out to learn the art of photography, I realized that more light does not equal better light. Whenever natural window light is used to craft a photo, it’s important to think about which direction the window faces and the time of day during which the picture will be taken. Window light creates two types of light: direct light and bounced light. Below, on the left, is an image created using direct light, and on the right is one done with bounced light.
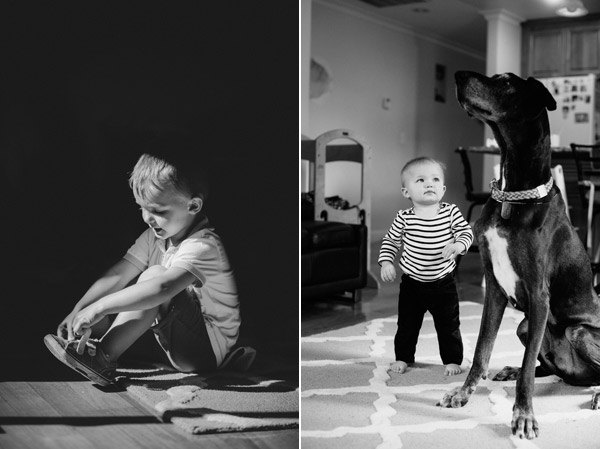
Direct light is the kind seen falling across the floor that creates a hard line. It will make it very difficult to expose the image properly because you must choose between the portions of the photo that are very bright and the portions of the photo that are very dark. I have light brown hardwood floors, and the direct light coming off of them adds a yellow tone to everything I photograph. Direct light reflects off the ground and illuminates your subject from the bottom-up, which looks unnatural and sometimes can even make your subject look a bit creepy! Bounced light is the light that comes in a window after bouncing off of light surfaces. Most of the time, photographers prefer bounced light.
When considering the areas in a space that might act as good staging areas for photographs, think about what direction the window faces, what nearby structures might be blocking it, and the type of lighting you want in your image. This is the starting point that will help you determine the ideal shooting time on a sunny day.
The window I’m using to demonstrate the way the light changes in my living room is almost floor-to-ceiling, faces southwest, has no awning directly over it, and has a house positioned south of it. All of these are important because they determine the amount time the room has direct light and the way the bounced light enters the room. It is important to note that there are other windows in the room I am using, which prevents the images below from being entirely backlit.
My first image was created at 11:30am in March, in a home in Northern California. Remember that the time of year and daylight savings time can affect the optimal time for photographing in a given area. The visible areas of most items in the room are pretty evenly lit. There isn’t much depth to the image, but this is the light I would want to use if I’m trying to sell my house and want to be able to show clearly what everything looks like.
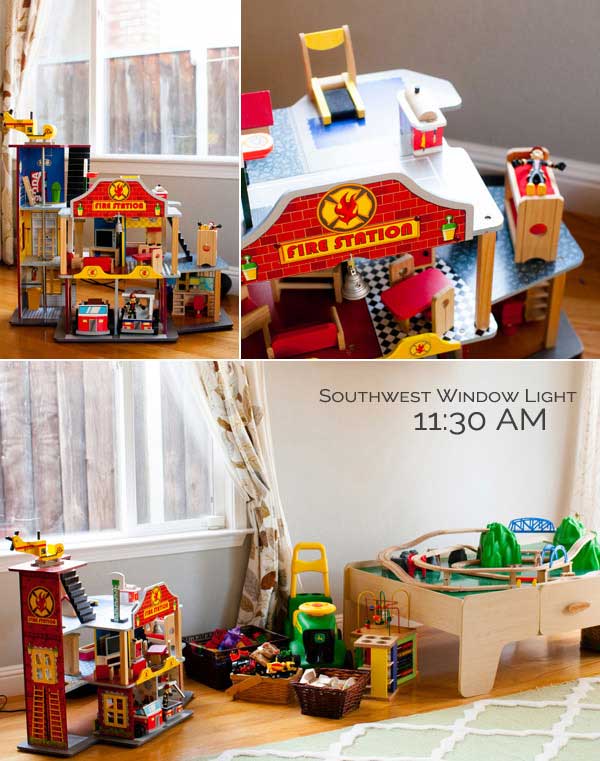
At 1:30pm some dappled hard light starts to make its way into the room as the sun shines through a tree next to my house.
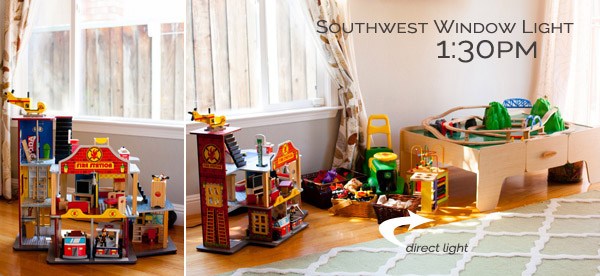
As the sun makes its way down the sky, the area in front of my window is covered in direct light. The tone of the room is very warm because of the color of my floors and rug. Late afternoon is my least favorite time to take photos in this area of the house.
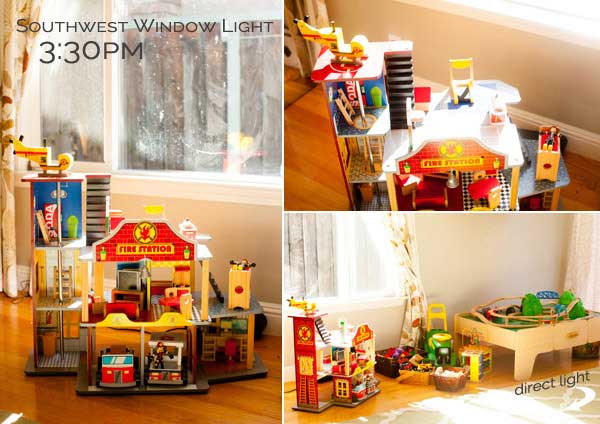
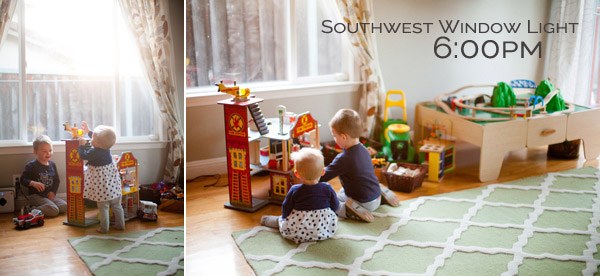
Once the sun dips below our backyard fence, the direct light disappears and it becomes my favorite time of day to photograph by this window. The light is warm and soft, and when I photograph my children playing on the floor it looks like the sunshine is kissing the top of their heads.
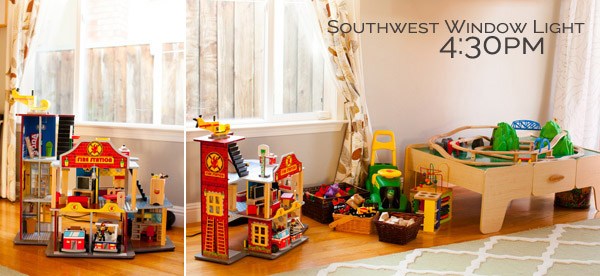
Right before the sun sets entirely the light is even again, and a bit flat. If I crank up my ISO, I am able to capture what’s happening as the day winds down, but my photos will be grainy and the colors will be muted.
The beauty of photography is that there is no one right way to do things. Learn how the light falls throughout the day in a given room and then have fun playing with the different looks direct and bounced light can create in that space.
Want more? Learn photography with the New York Institute of Photography, the largest and longest running photography school in the world. Get started today.


