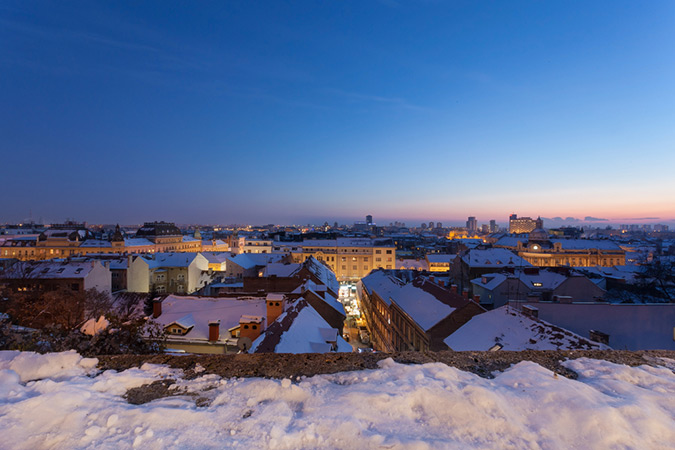
If you’re a photography enthusiast, you have most likely heard the phrase “Blue Hour” before- but what does it actually mean?
Also called Magic Hour or Golden Hour, this fleeting mid-sunset, pre-darkness time of day offers photographers some very special lighting and compositional opportunities. But how can you best take advantage? Below you’ll find some simple tips for improving your Blue Hour photos.
Firstly, timing is everything when it comes to outdoor photography, and couldn’t be more true for Blue Hour shoots. Many photographers find the brief, post-sunset time of day to be the ideal Blue Hour timing, but you can actually catch similar lighting and hue conditions right before a morning sunrise. On average, these unique Blue Hour lighting windows last about 20 to 40 minutes, so you have to plan accordingly and work diligently in order to capitalize.
Pinpointing these cursory times can be a challenge- but lucky for us, this awesome NYIP graduate developed a Smartphone app for photographers that will actually do the calculating for you.
Once you’ve got your timing planned out, it’s time to get technical. One of the more convenient aspects of blue hour photography is that it actually gives you a great deal of flexibility when it comes to what settings you choose.
These settings will mostly depend on the type of scenery you’re trying to capture. For example, if you’re photographing a cityscape you likely want to to keep both the foreground and background sharp and well-lit . That means the f-stop depth of field setting is your most crucial adjustment. Try starting with something around f8 and adjust accordingly as you check out the results (here's a perfect example, shot by NYIP student Anil Kumar).
Finally, post-production can be an important part of the Blue Hour photography process as well. Adjusting a number of elements- boosting contrast, playing with saturation, or even retouching can really help enhance the final look of a landscape shot like this. If you're unfamiliar with the post production process and looking for some formal training, be sure to check out our comprehensive online Photoshop course for some help.


